Changing and Realigning the Aperture
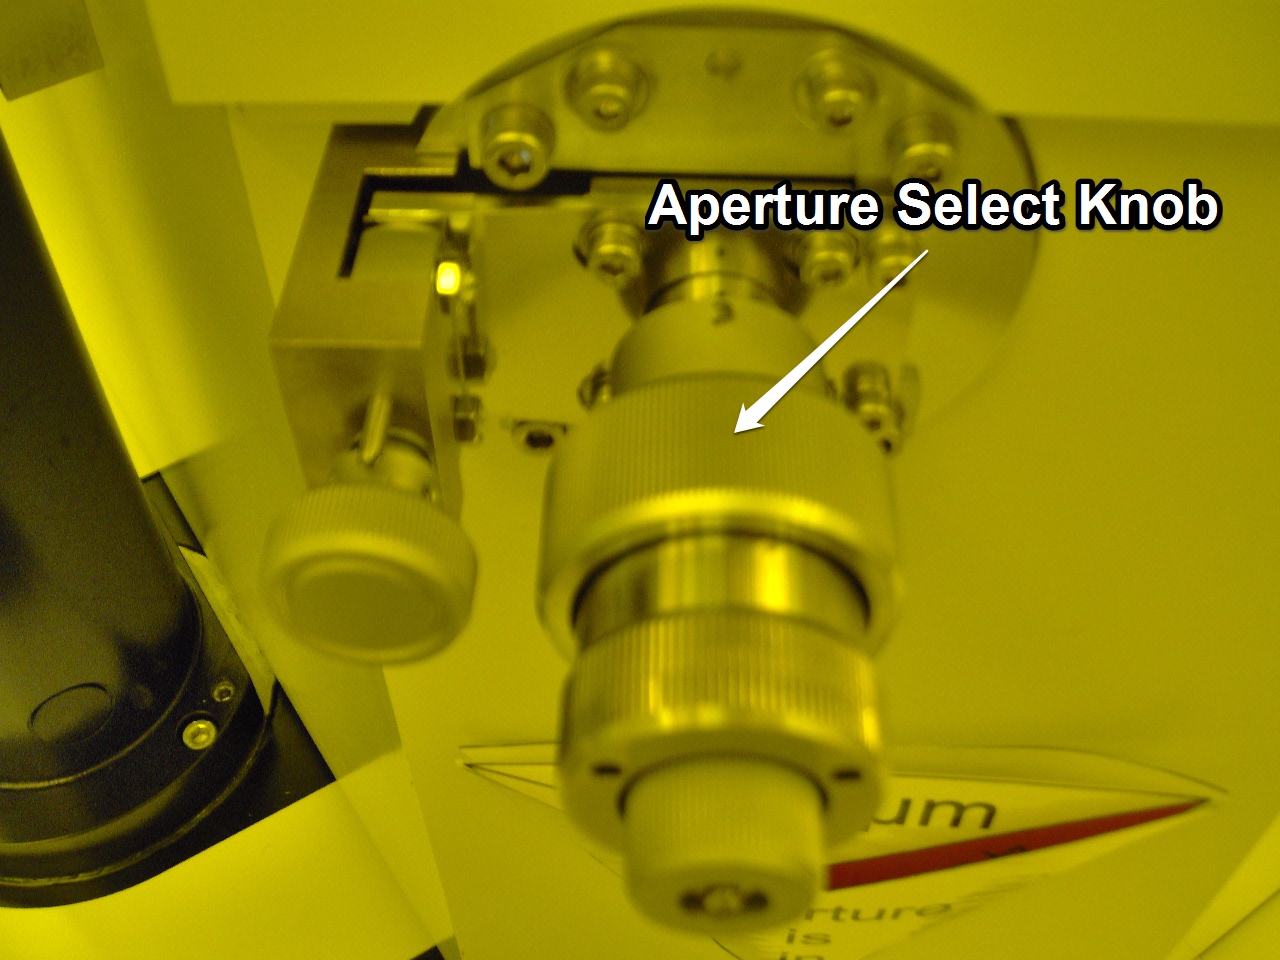
The standard 300 μm aperture in the EBPG will serve your purposes for 99.999% of writing jobs. In certain situations, however, you may want to switch to the 400 μm aperture to take advantage of the higher maximum beam current it allows. This is a step-by-step guide to changing the aperture, then aligning it with the rest of the column. The image below shows where to find the aperture adjustment controls on the body of the tool.

- Set the aperture-select knob (the inner right-hand knob) to the aperture you want. Currently there are two 300 μm and one 400 μm apertures loaded. The knob has three positions and the apertures in each position are labeled on the barrel.
- Switch the aperture variable in the system using
pg set apert <width>, where <width> is the aperture width in microns (eg pg adjust apert 300). Run the $pg save command immediately after doing this.
- Load a beam set up for the aperture you just switched to with the
beamload command (use beamlist to see the list of available beams for the aperture).
- Load a holder and find the calibration mark with
mvm
- Run the shortcut
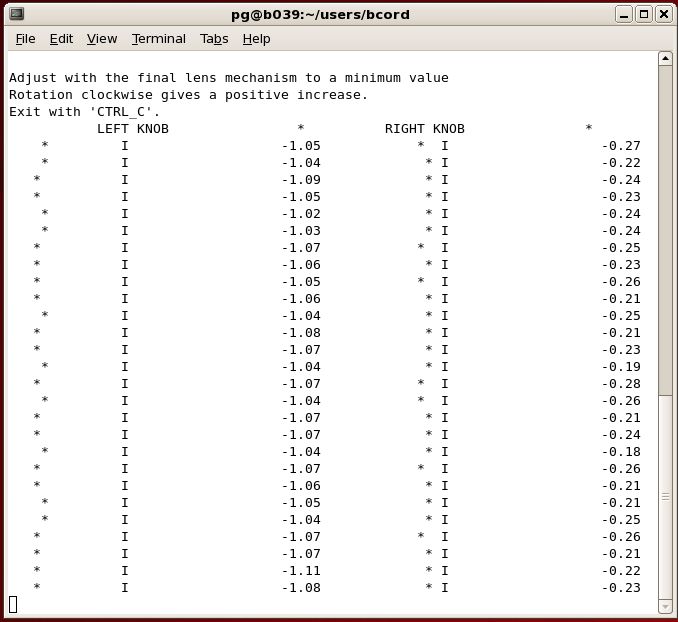
afl, which will continually scan the calibration mark and scroll two columns labeled LEFT KNOB and RIGHT KNOB down the screen. The columns have a row of capital I’s in the center and asterisks to the left or right; alignment offset is represented by the distance between the asterisks and the capital I’s. You may want to stretch the terminal window to the length of the screen for maximum visibility.
- With the
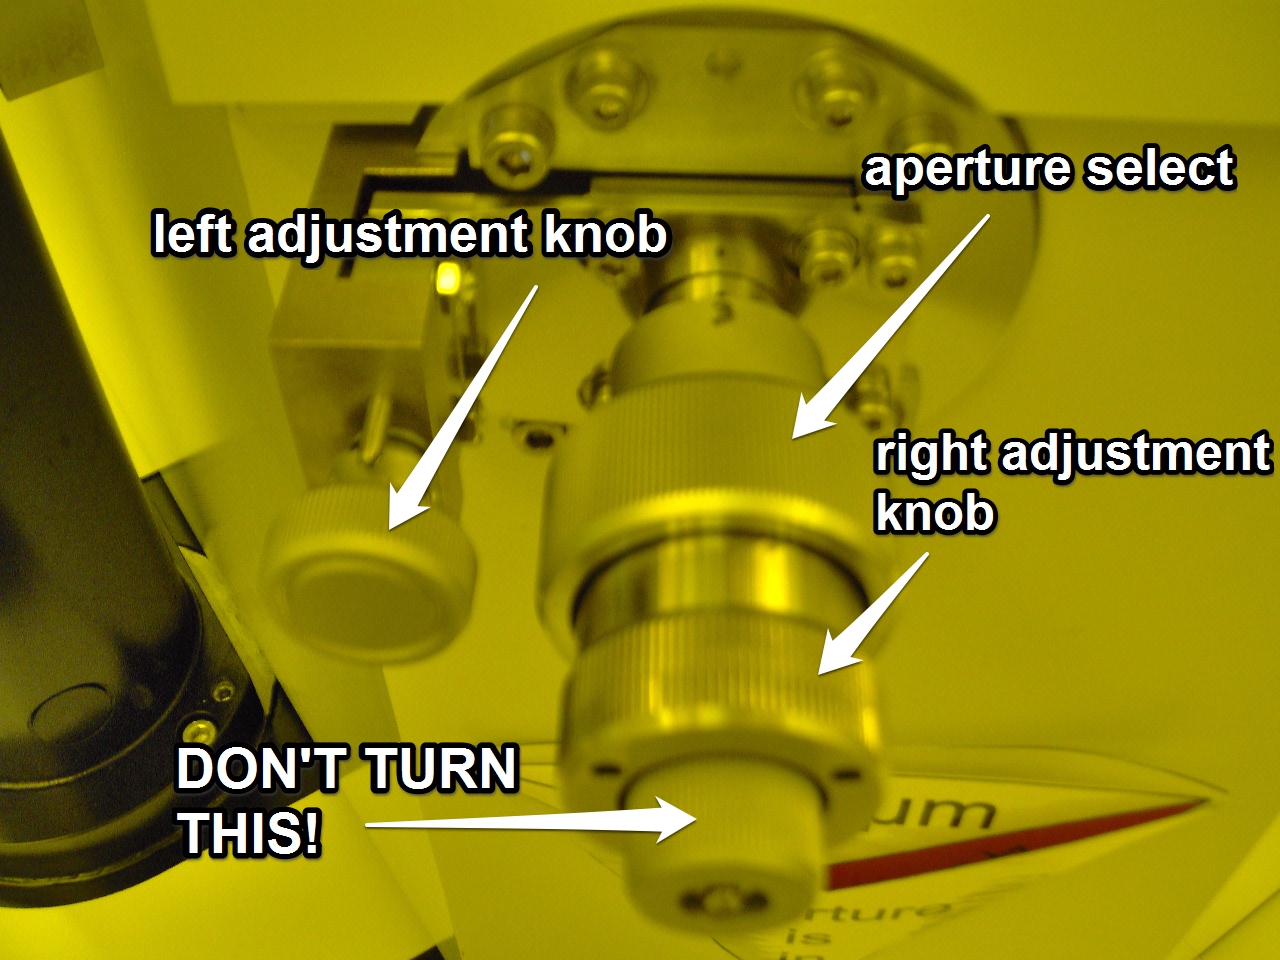
afl routine running and while keeping an eye on the screen, use the two adjustment knobs on the aperture holder to bring both asterisks in line with the capital I’s in the center of each column. Don’t turn the knobs too quickly or the system may lose the calibration mark. If this happens, run mvm once or twice and start the afl routine again.
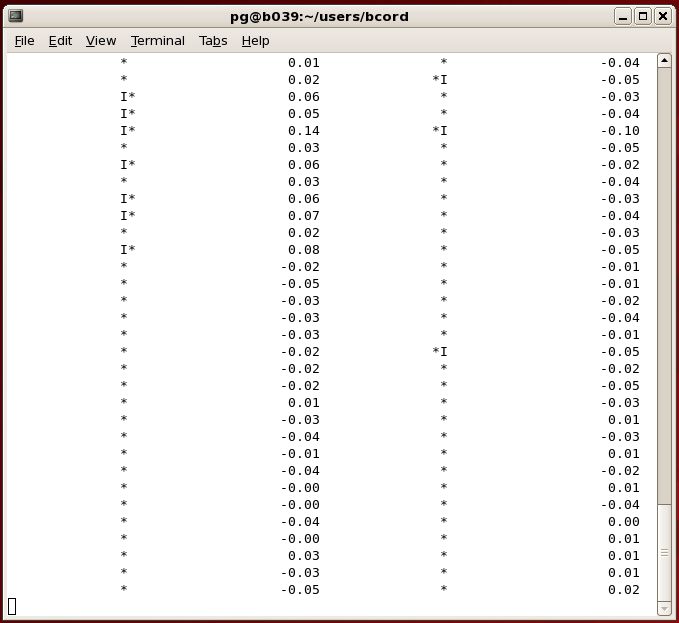
- When both the left and right knob are aligned (both columns have shown nothing but an asterisk in the center for at least ten scans) you can cancel the afl routine with CTRL-C
- Run
mvm and check the focus with afa to ensure that everything is aligned and working. If there are no error messages, the system should be usable again.
- Don’t forget to change the sign under the aperture adjustment knobs so it shows the aperture the machine is now set to!
Always reset the aperture to 300 μm when you’re done using the tool